1. Setup
SLEAP uses deep neural networks to learn how to predict poses from data. Training these models is much faster when using a GPU (1) for acceleration.
- Graphics processing unit. This is a hardware component that parallelizes computations across thousands of cores, making them particularly effective for the algorithms used to train deep neural networks.
Since GPUs are hard to come by on laptops, for this tutorial we are providing tutorial attendees with free access to GPU-equipped Virtual Machines (VMs) running in the cloud (Option A). We strongly recommend this option since it comes with SLEAP preinstalled! See the VMs FAQ for more info.
If you know you have a GPU on your machine or have a Mac with Apple Silicon, you can install SLEAP locally (Option B).
Warning
The rest of this tutorial assumes you went with Option A. If you're comfortable with the terminal and figuring some things out yourself, you'll still be able to follow along with a local install.
Option A: Requesting a VM (recommended)
Set up your VM
-
Go to Chrome Remote Desktop and sign in with any Google account (work or personal).
-
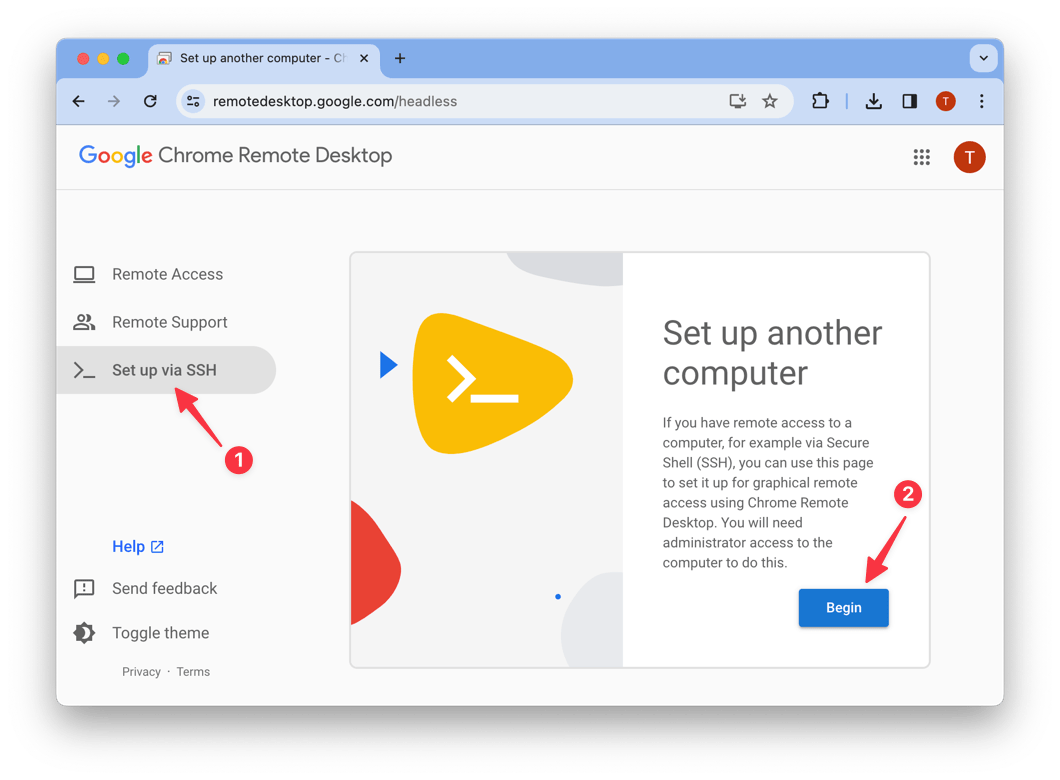
Go to Set up via SSH → Begin.
-
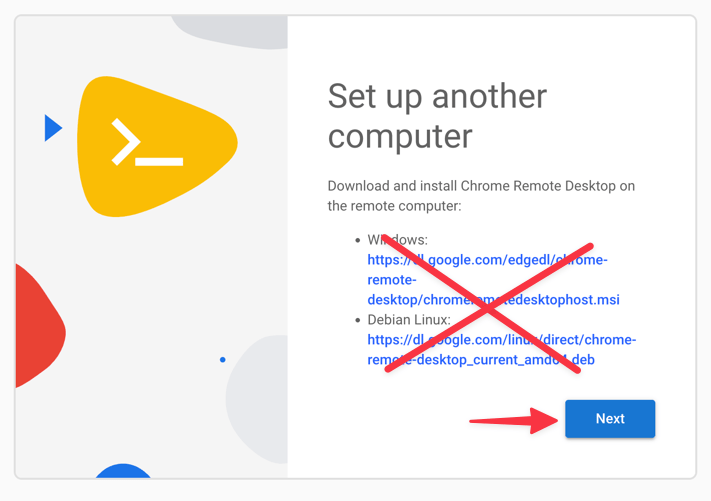
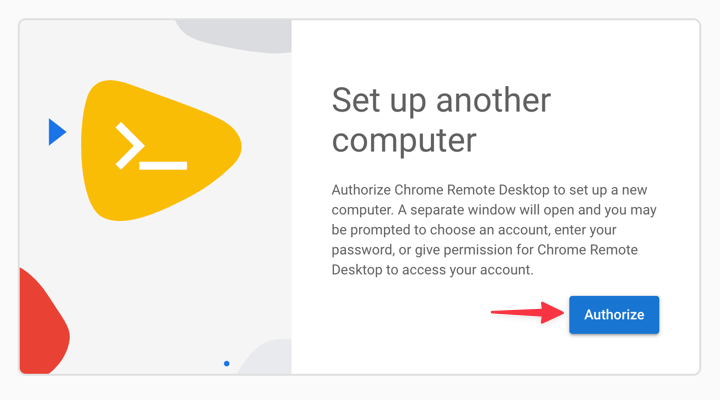
Click through Next → Authorize. You do not need to download anything from the links.
-
Click on the button to copy the code for Debian Linux.

-
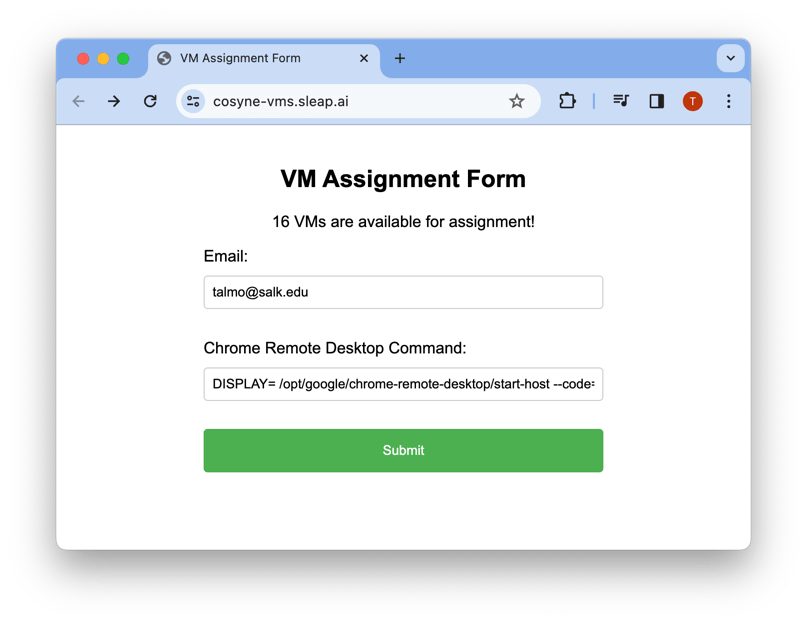
Go to the VM request website , enter your email and paste the code (Ctrl+V on PC or Cmd+V on Mac) from the previous step, then click Submit.
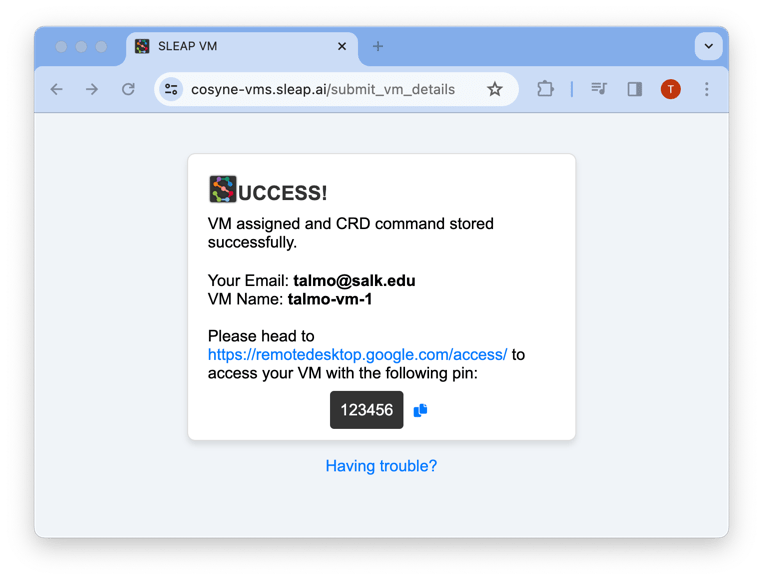
-
Go back to Chrome Remote Desktop → Access and you will see your VM. Click on the VM's name to connect.
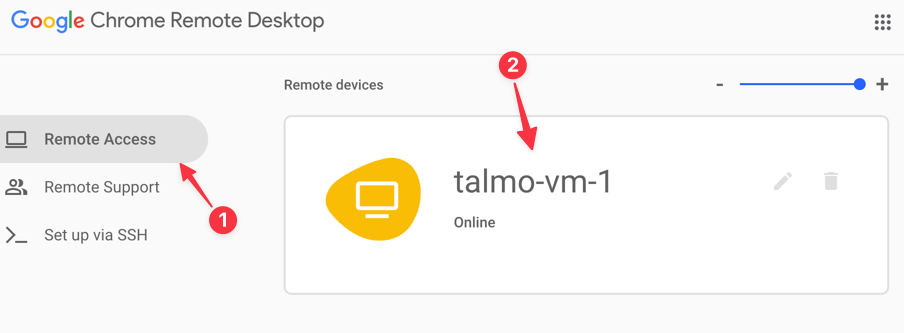
-
The first time you connect to the VM, you will be prompted for the PIN from the VM request website. Enter it and check Remember my PIN on this device.
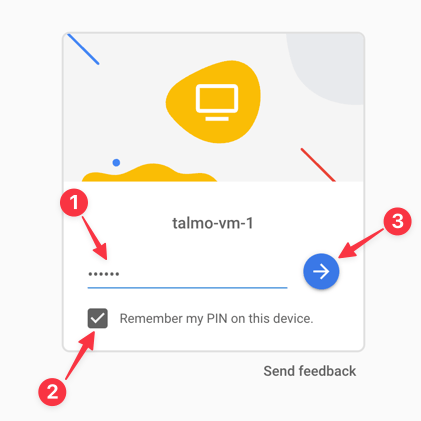
-
You did it!
If everything went well, you will see the VM's desktop in your browser:
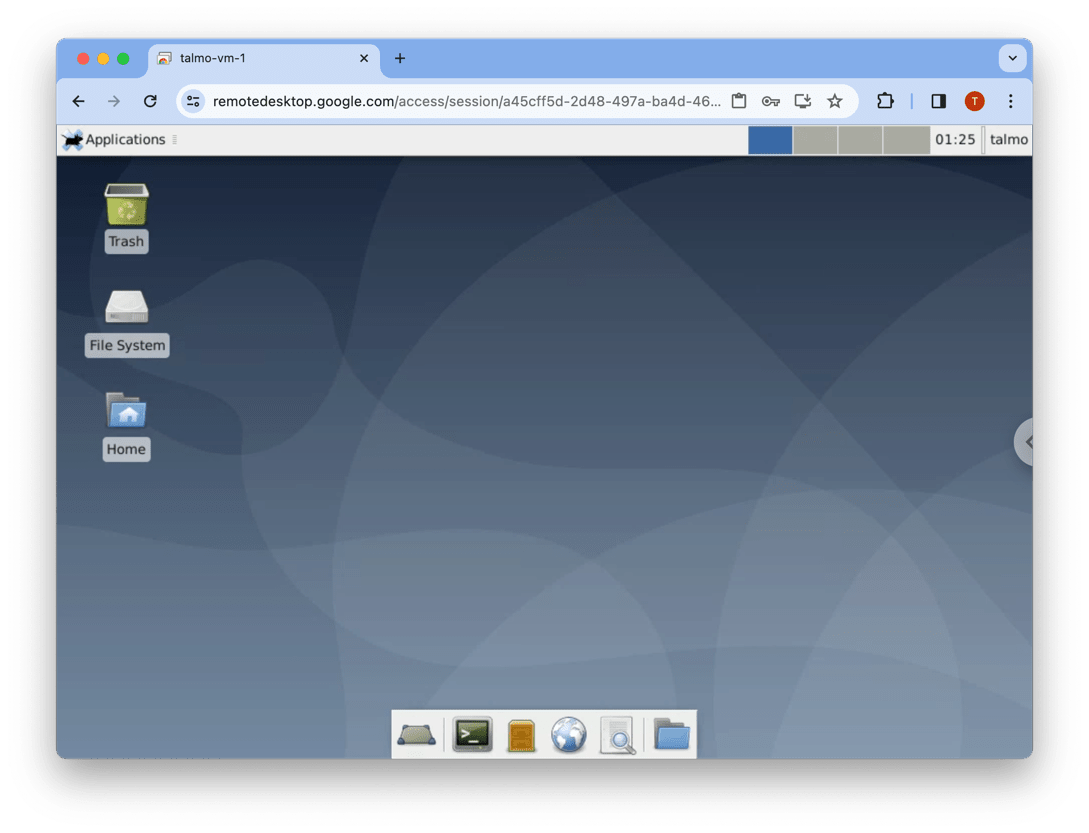
Continue to the next section to test that your setup is working.
Starting SLEAP in the VM
If you don't have it open, connect to your VM through Chrome Remote Desktop → Access .
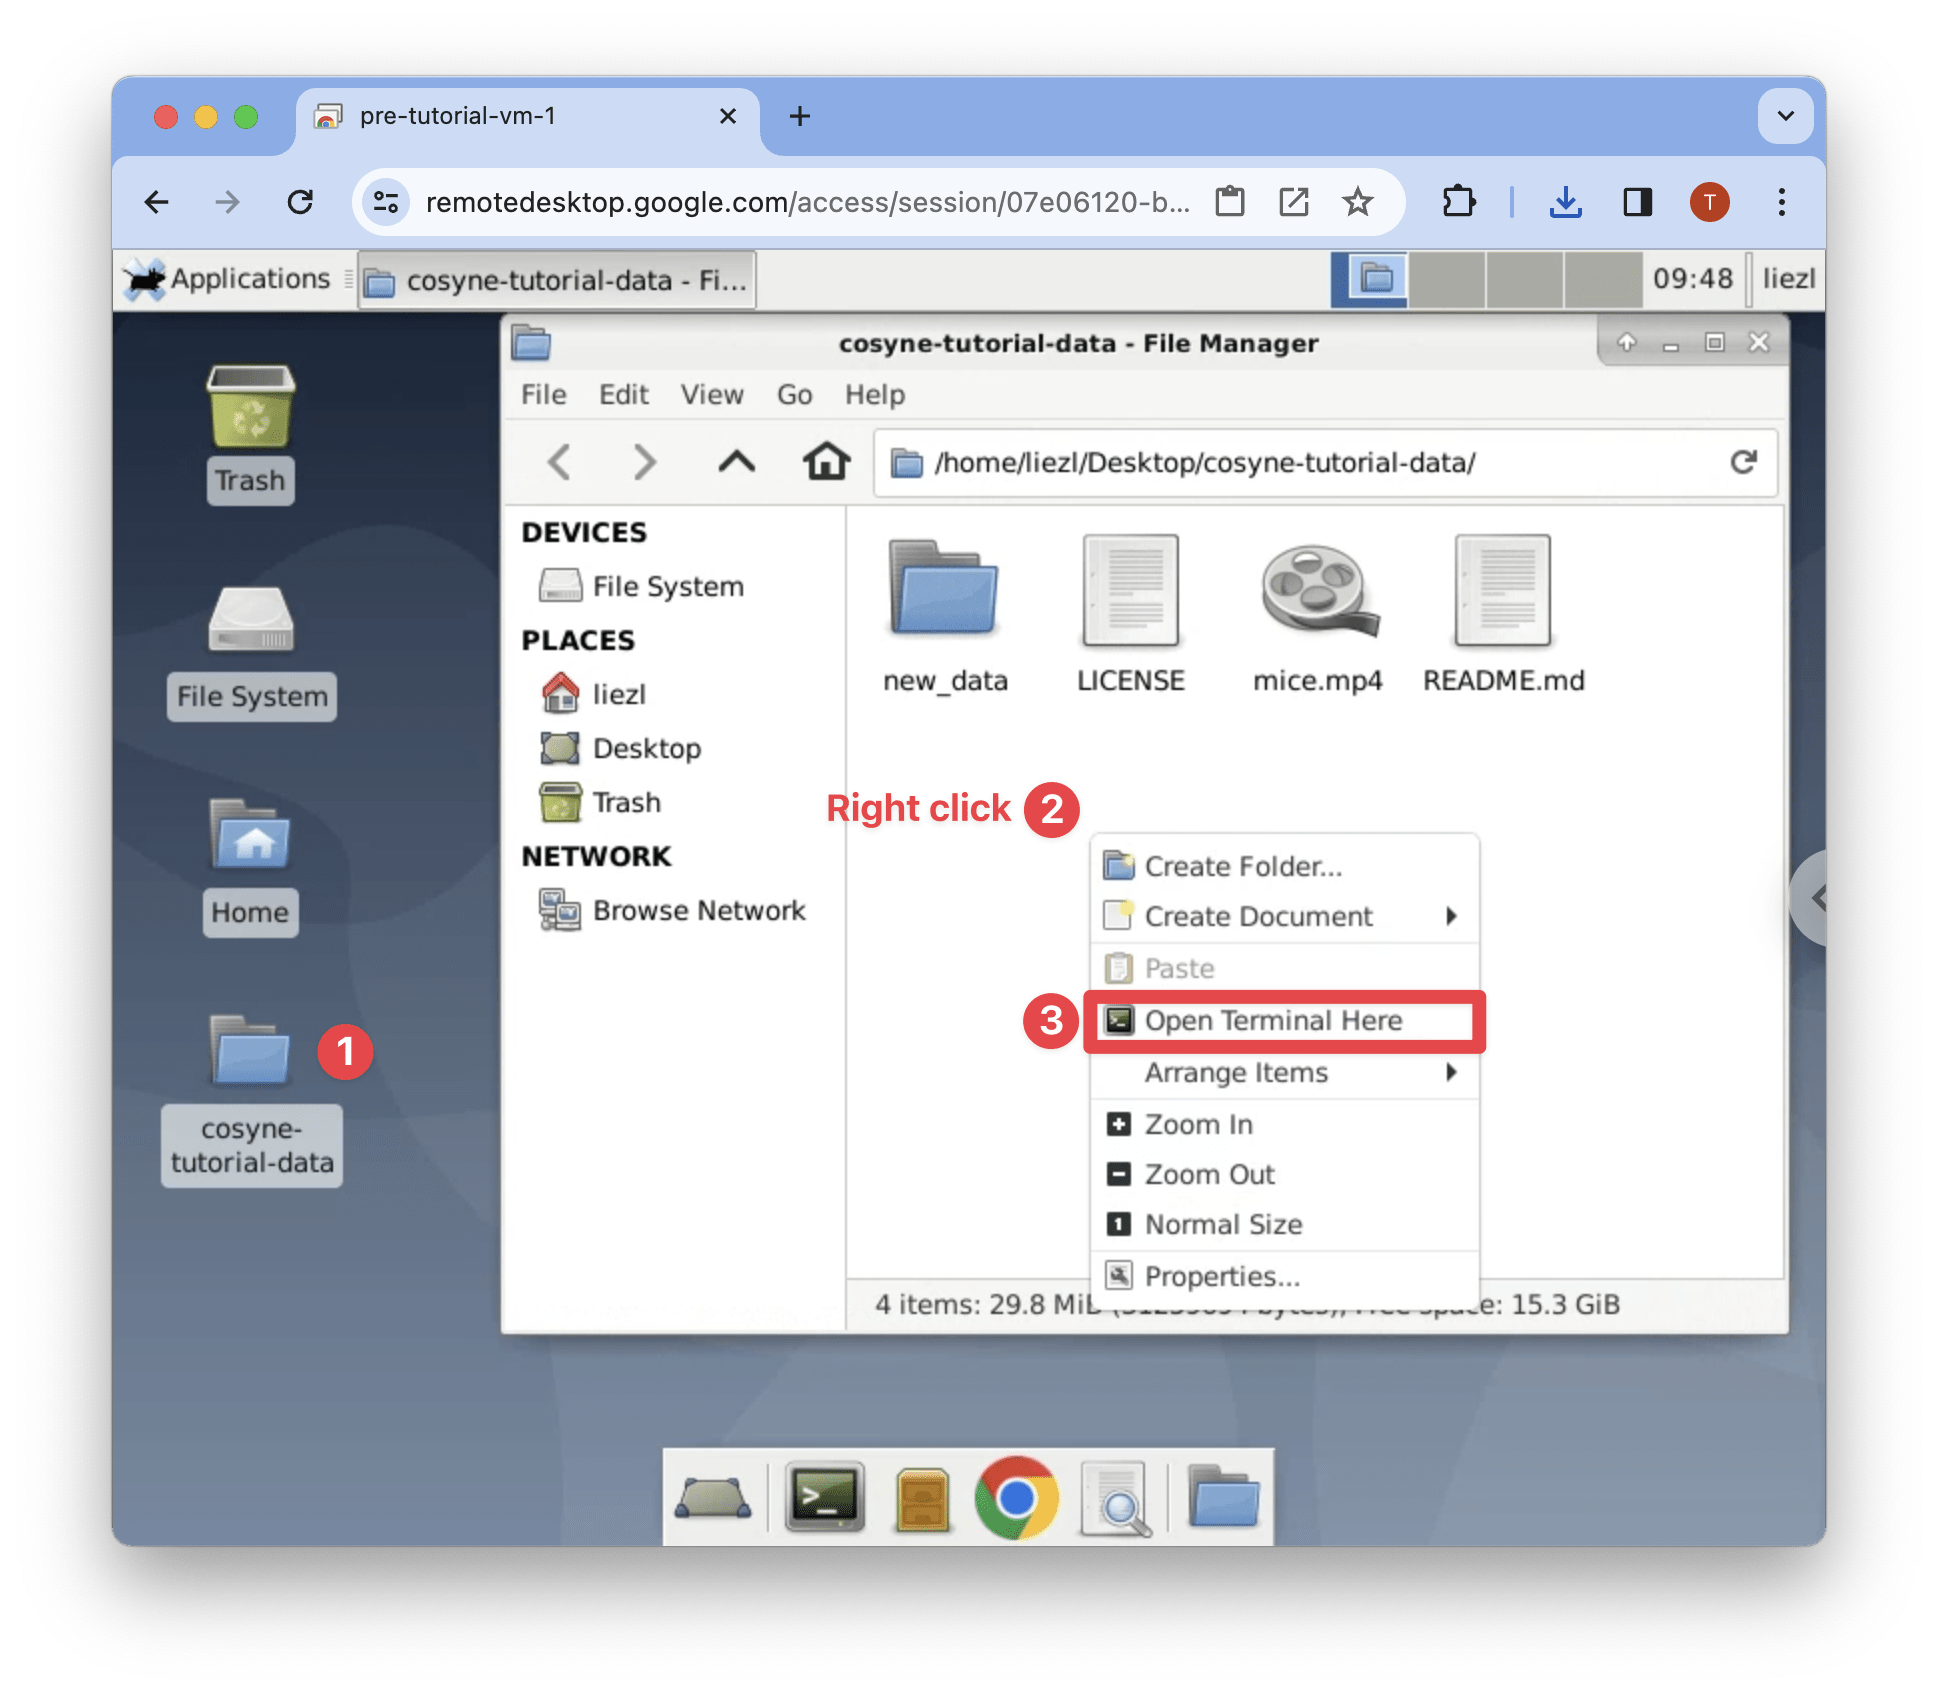
To launch SLEAP, first open the terminal by right-clicking in the background of a folder and clicking Open Terminal Here:
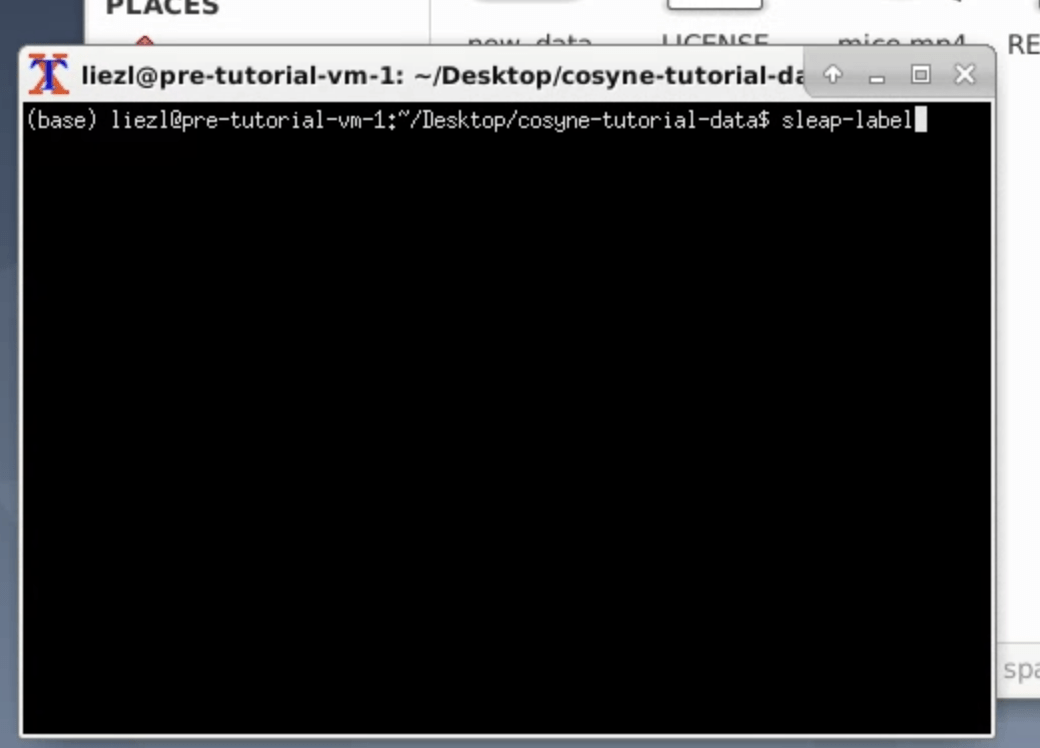
Then type in the magic command followed by Enter:
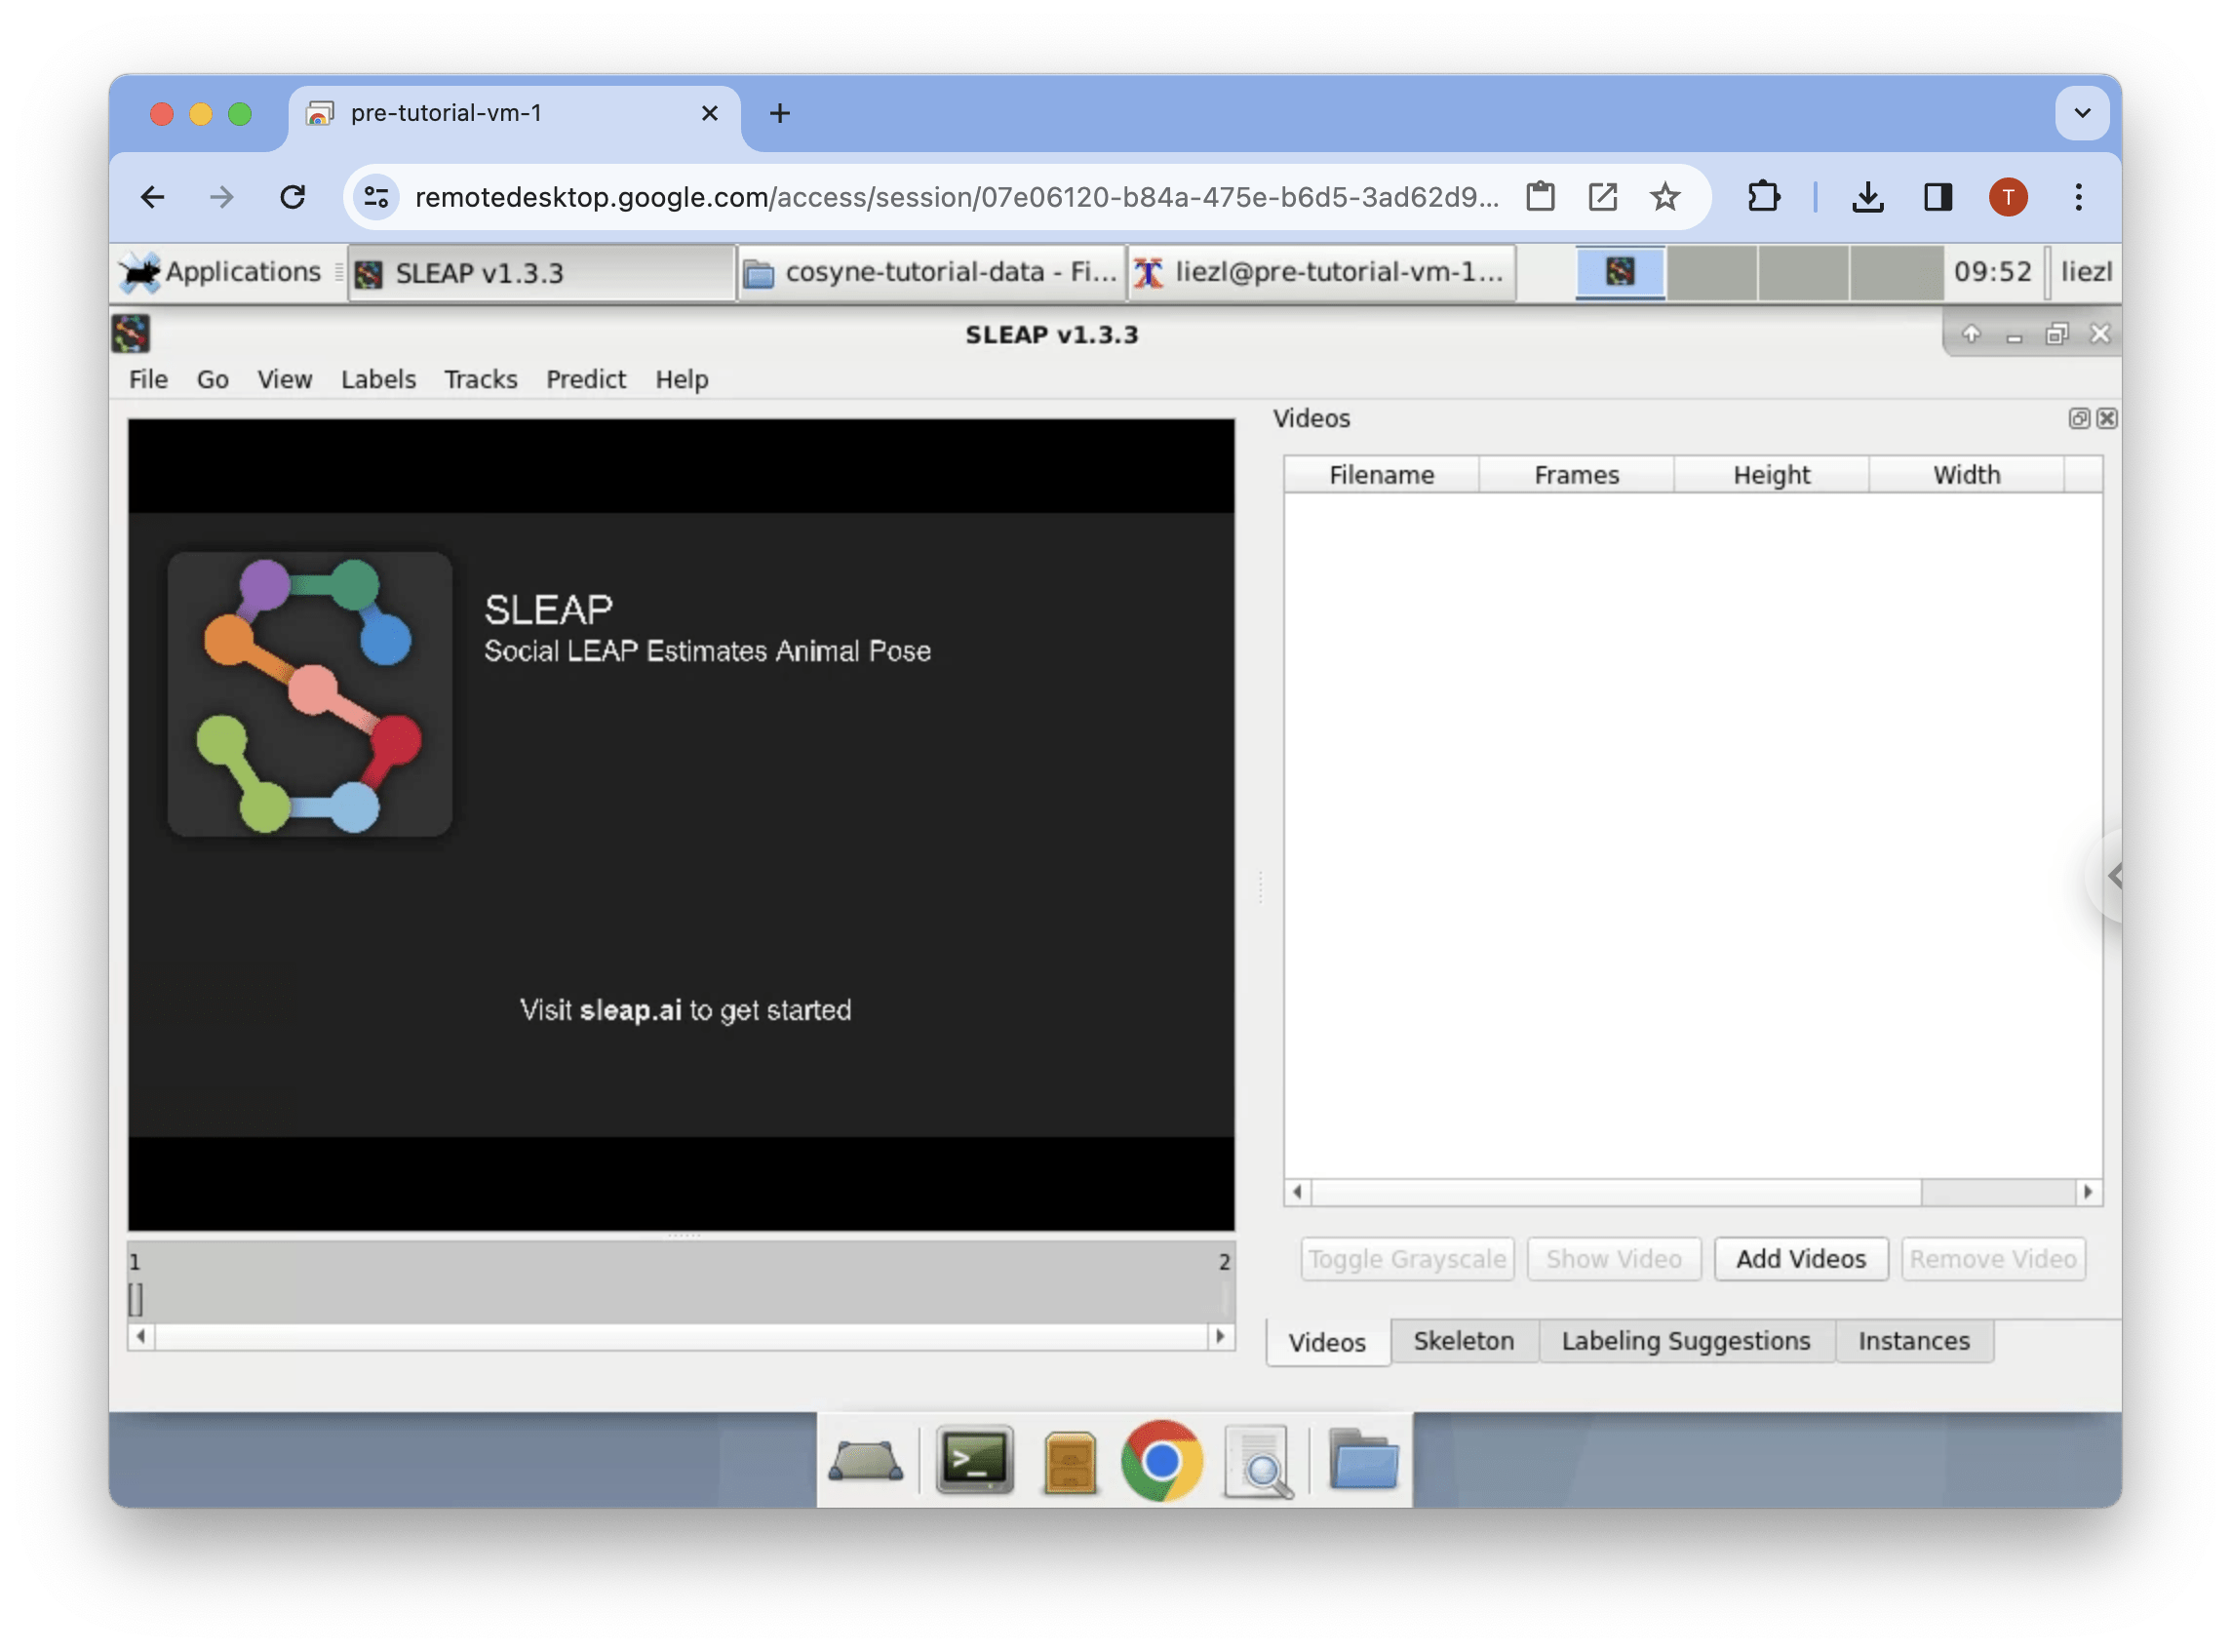
Et voila, the SLEAP interface will open:
Tip
It'll be easier to keep the VM Chrome Remote Desktop in fullscreen.
You can open the tutorial website inside the VM as you're working through it so you don't have to switch in and out of fullscreen mode.
To do this, just launch Google Chrome from the bottom dock and navigate to tutorial.sleap.ai.
VMs FAQ
What are Virtual Machines (VMs)?
VMs are software-defined virtual computers. They run an entire operating system inside of another computer. Most software running on the cloud run inside VMs. VMs have the advantage of providing reproducible computing environments that are isolated from the base computer.
What is Chrome Remote Desktop?
Chrome Remote Desktop is a free service by Google that allows you to connect to remote computers. We chose it because it can be configured programmatically and, since it runs in the browser, is supported across all platforms and doesn't require any additional downloads or software installations.
What happens when I disconnect from Chrome Remote Desktop?
Nothing! The VM will continue running and you'll come back to the same screen the next time you connect to it.
Can I configure Chrome Remote Desktop to improve performance?
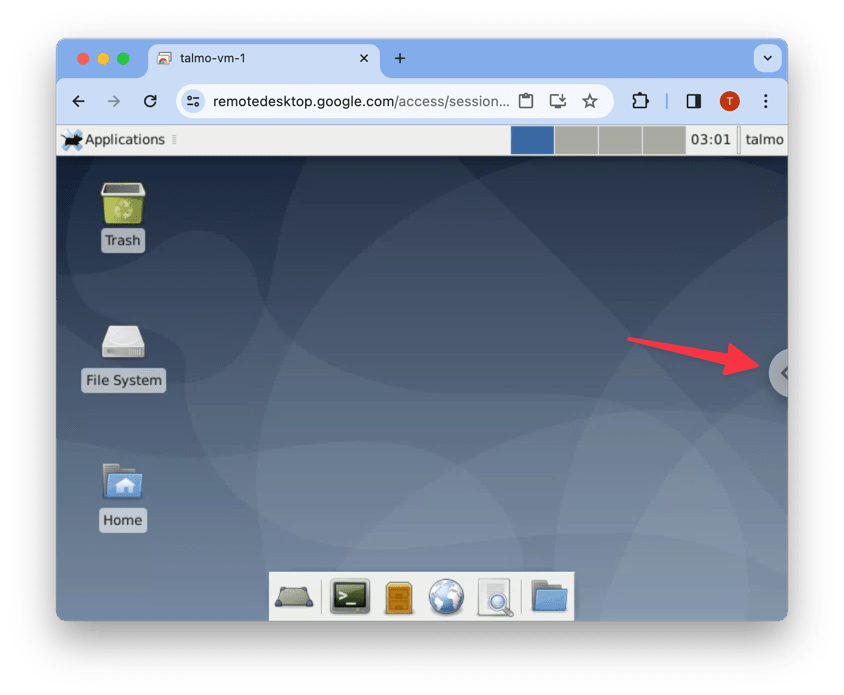
Yes! First, open the options by clicking the arrow on the side of the screen:
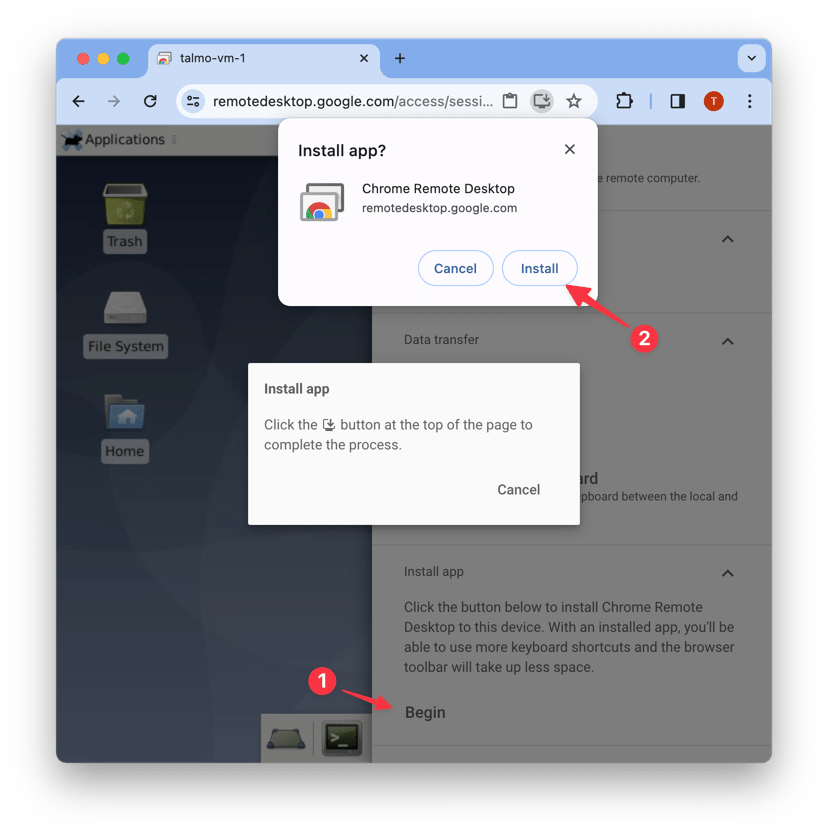
There are lots of options to tweak there. You can also install the local app which may improve performance and enable new features:
How do I get my data in or out of the VM?
You can launch a web browser from the VM's bottom taskbar. From there, you can login to your cloud storage service (e.g., Google Drive, Dropbox, OneDrive, etc.) or email to upload your files.
No one but you will have access to your VM and it will be permanently deleted within 24 hours, but if you're security-conscious, you can open a New Incognito Window in Chrome and login there without storing your credentials.
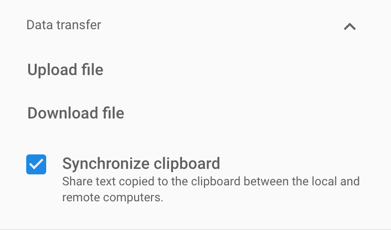
Alternatively, Chrome Remote Desktop has an option to transfer data directly from the interface. First, open the options by clicking the arrow on the side of the screen:

Then, scroll down to the data transfer section:
Where are these VMs actually running? Who's paying for them?
We are running the VMs for this tutorial on Google Cloud Platform. The servers are physically located in Google's data centers in the central US.
We are technically "renting" these computing resources from Google. They are quite expensive, so they will only be available for a limited time during the tutorial session.
How long will I be able to use these VMs? What happens afterward?
You will have 24 hours after the tutorial ends before the VMs are shut down. Once that happens, any data stored on it will no longer be accessible, so make sure to copy your stuff off of it!
Option B: Install SLEAP locally
If you have either a Linux or Windows laptop with a GPU, or a Mac with Apple Silicon, SLEAP will work natively with hardware acceleration.
-
Make sure that you have Miniforge installed.
You can also use Miniconda or vanilla Anaconda, but we recommend Miniforge since it is much faster to resolve dependencies, thus making the installation much faster. If you use Anaconda, replace
mambawithcondain the commands below.To install Miniforge:
Open a new PowerShell terminal (does not need to be admin) and enter:
Invoke-WebRequest -Uri "https://github.com/conda-forge/miniforge/releases/latest/download/Miniforge3-Windows-x86_64.exe" -OutFile "$env:UserProfile/Downloads/Miniforge3-Windows-x86_64.exe"; Start-Process -FilePath "$env:UserProfile/Downloads/Miniforge3-Windows-x86_64.exe" -ArgumentList "/InstallationType=JustMe /RegisterPython=1 /S" -Wait; Remove-Item -Path "$env:UserProfile/Downloads/Miniforge3-Windows-x86_64.exe"Open a new terminal and enter:
curl -fsSL --compressed https://github.com/conda-forge/miniforge/releases/latest/download/Miniforge3-Linux-x86_64.sh -o "~/Downloads/Miniforge3-Linux-x86_64.sh" && chmod +x "~/Downloads/Miniforge3-Linux-x86_64.sh" && "~/Downloads/Miniforge3-Linux-x86_64.sh" -b -p ~/miniforge3 && rm "~/Downloads/Miniforge3-Linux-x86_64.sh" && ~/miniforge3/bin/conda init "$(basename "${SHELL}")" && source "$HOME/.$(basename "${SHELL}")rc"Open a new terminal and enter:
curl -fsSL --compressed https://github.com/conda-forge/miniforge/releases/latest/download/Miniforge3-MacOSX-arm64.sh -o "~/Downloads/Miniforge3-MacOSX-arm64.sh" && chmod +x "~/Downloads/Miniforge3-MacOSX-arm64.sh" && "~/Downloads/Miniforge3-MacOSX-arm64.sh" -b -p ~/miniforge3 && rm "~/Downloads/Miniforge3-MacOSX-arm64.sh" && ~/miniforge3/bin/conda init "$(basename "${SHELL}")" && source "$HOME/.$(basename "${SHELL}")rc"Open a new terminal and enter:
curl -fsSL --compressed https://github.com/conda-forge/miniforge/releases/latest/download/Miniforge3-MacOSX-x86_64.sh -o "~/Downloads/Miniforge3-MacOSX-x86_64.sh" && chmod +x "~/Downloads/Miniforge3-MacOSX-x86_64.sh" && "~/Downloads/Miniforge3-MacOSX-x86_64.sh" -b -p ~/miniforge3 && rm "~/Downloads/Miniforge3-MacOSX-x86_64.sh" && ~/miniforge3/bin/conda init "$(basename "${SHELL}")" && source "$HOME/.$(basename "${SHELL}")rc" -
Install SLEAP in a new environment.
See the main SLEAP installation instructions for more information.