4. Training a model
Configuring an initial model
SLEAP allows you to customize the approach and architecture to fit your needs. Generally speaking, the bigger the model, the more accurate it will be, but also slower to train.
In the beginning stages of a project, we care more about speed than accuracy; our goal is to train a model that can generate predictions that are just accurate enough that it takes less time to correct its predictions than to label from scratch.
As we add more labeled frames, the accuracy will very quickly improve, so there's no point in training a big and slow model.
Even though we've only labeled a single frame so far, let's see what happens when we train a super lightweight model.
-
In the menu bar at the top, click Predict → Run Training... to open the training pipeline configuration window.
Save first
SLEAP refuses to start training while the project has unsaved changes. If you see "You have unsaved changes. Please save before running training or inference.", hit OK, then File → Save (Ctrl+S) and try again.
-
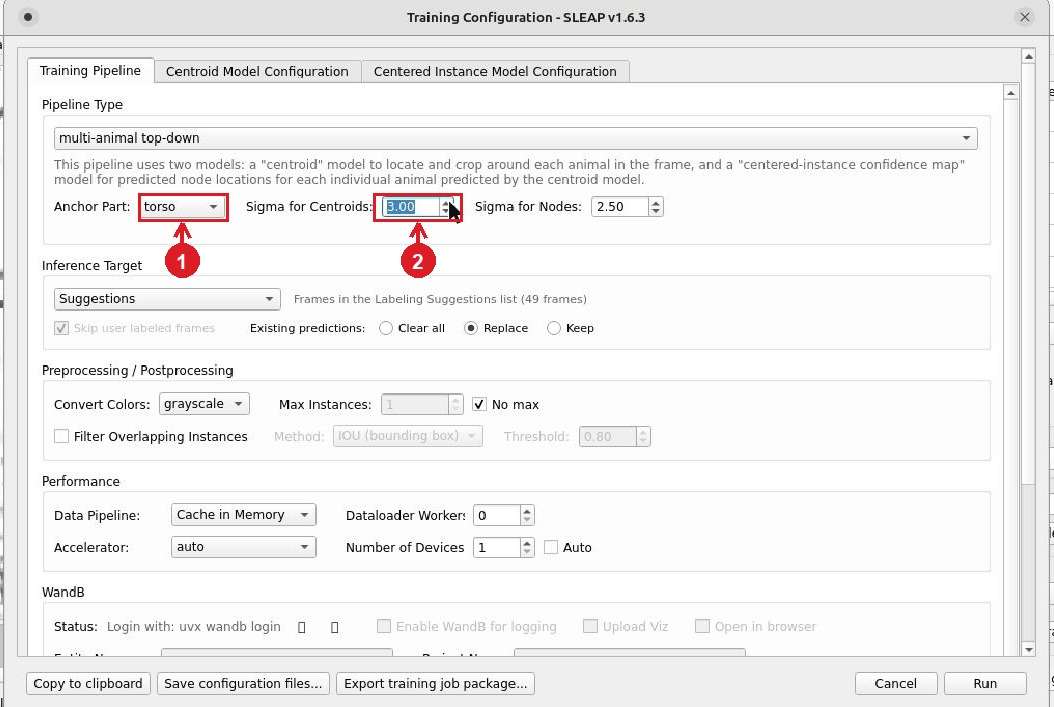
In the Training Pipeline tab, adjust these settings:
Sigma for Centroids → 3 (defaults to
2.50) (1)- Increasing sigma makes the centroid confidence maps coarser, making it easier to detect the animals but less precise.
Anchor Part → torso (1)
- Choosing a specific node to use as the centroid leads to more consistent results than using the "center of mass" which often falls on different parts of the animal. This matters as the second stage of top-down models depend on the relative positioning of the animal within the centroid-anchored crop.
Can't see part of the configuration window?
The configuration window is taller than it looks — scroll inside it to reach settings near the bottom. On the Centered Instance Model Configuration tab in particular, Epochs sits just below Batch Size and is usually off-screen until you scroll.
Putting your browser in full-screen mode also gives the window more room.
-
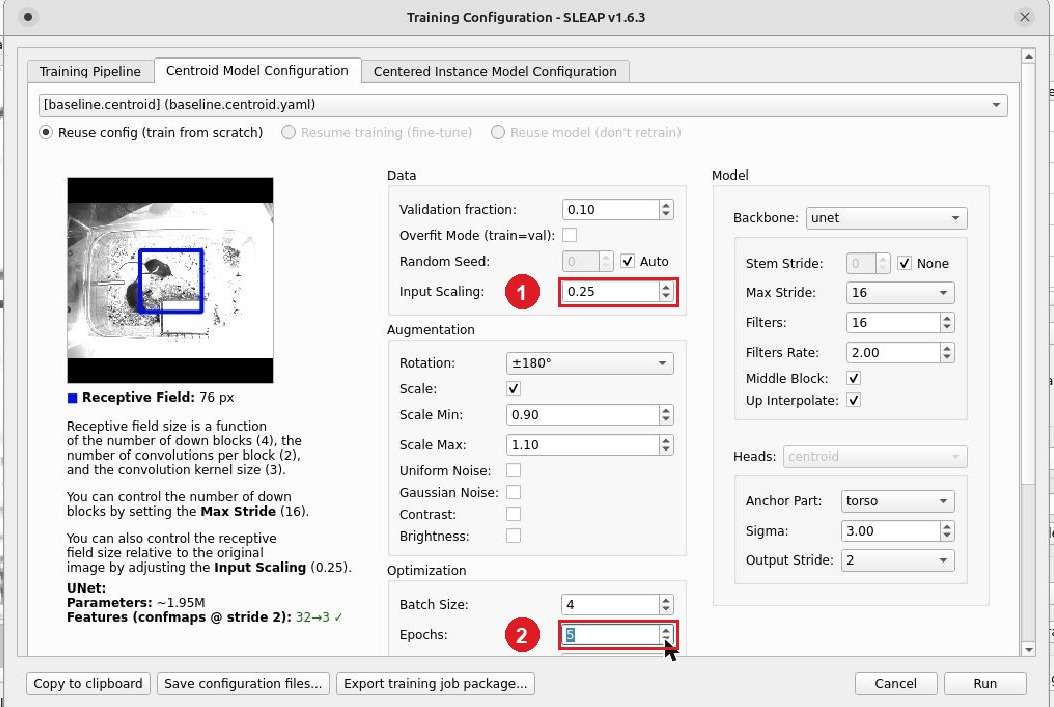
Go to the Centroid Model Configuration tab and change these settings:
Input Scaling → 0.25 (defaults to
0.50) (1)- Since the centroid of the animal can be detected coarsely, we can reduce the input image resolution to save on a lot of computation, at the expense of localization accuracy. This is a good trade-off in the early stages of labeling when little training data is available anyway.
Epochs → 5 (1)
- Training runs for a fixed number of epochs, and the default of
200is far more than we need here. Normally SLEAP stops early when the validation loss plateaus, but with a single labeled frame we set this manually to get a quick and dirty training run.
-
Go to the Centered Instance Model Configuration tab and change these settings:
Epochs → 5 (1)
- Training runs for a fixed number of epochs, and the default of
200is far more than we need here. Normally SLEAP stops early when the validation loss plateaus, but with a single labeled frame we set this manually to get a quick and dirty training run.
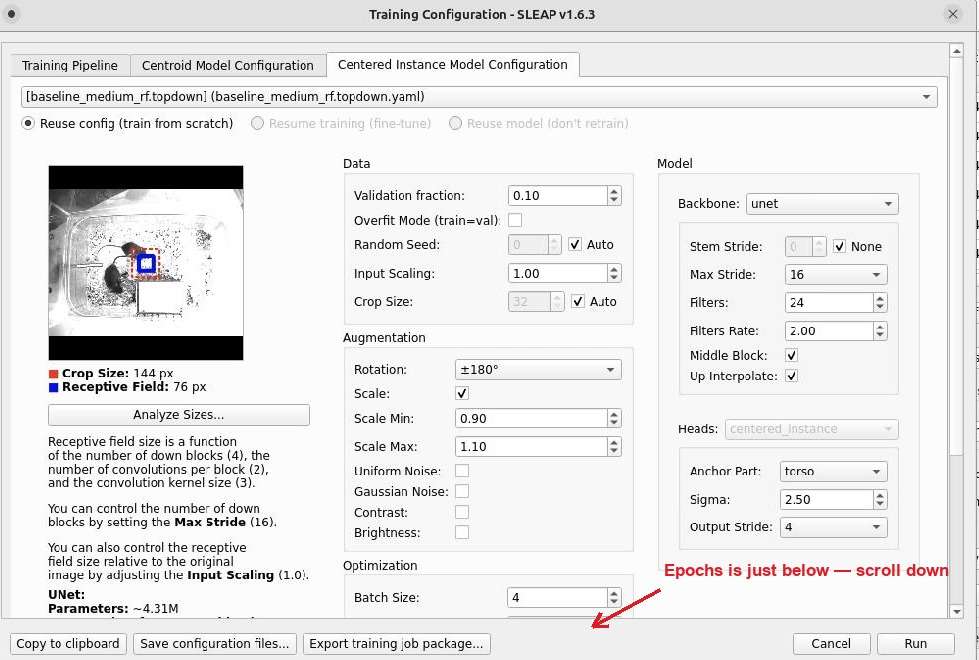
Epochs is below the fold
The screenshot above doesn't show Epochs — it's cut off below Batch Size. Scroll down inside the window to find it.
- Training runs for a fixed number of epochs, and the default of
-
Hit the Run button at the bottom of the window to start training!
Training will start after a few seconds. You will see a window showing the loss and a preview of the predictions:
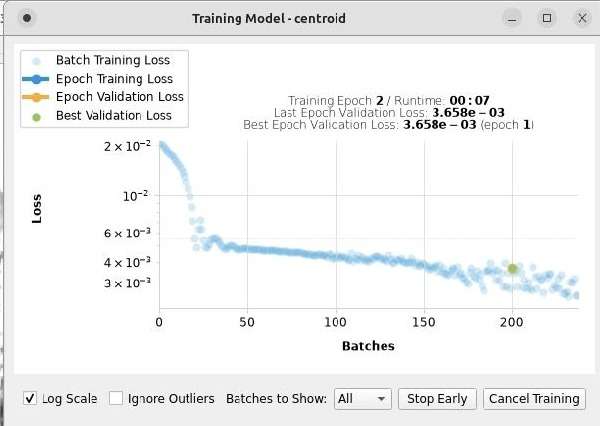
Training for top-down models occurs in two stages (centroid → centered instance). SLEAP will automatically start the second stage once the first one finishes.
Alongside the loss plot, SLEAP opens small validation windows previewing what the model currently predicts — confidence-map blobs for the centroid stage, and a skeleton drawn on a cropped animal for the centered-instance stage:
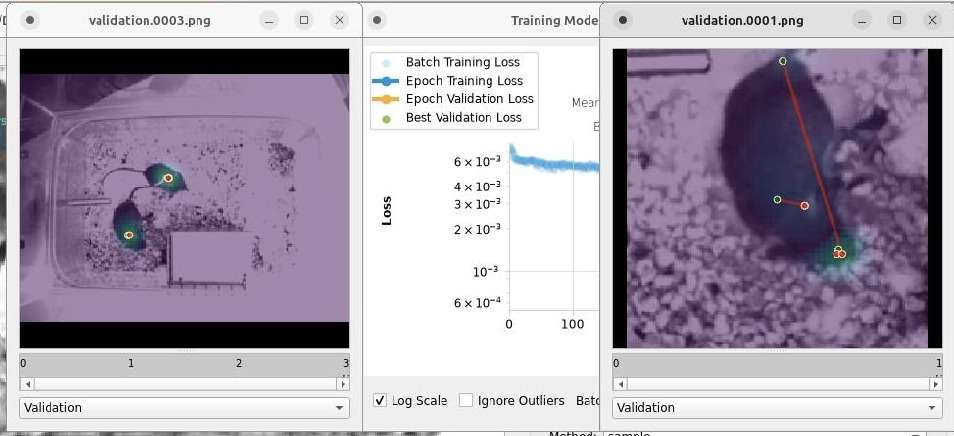
On a GPU-equipped VM this whole process takes well under 5 minutes — roughly a minute of training at these settings, plus a few seconds of inference.
-
Once training finishes, SLEAP will automatically use the model to predict instances in the remaining unlabeled frames in the Labeling Suggestions:
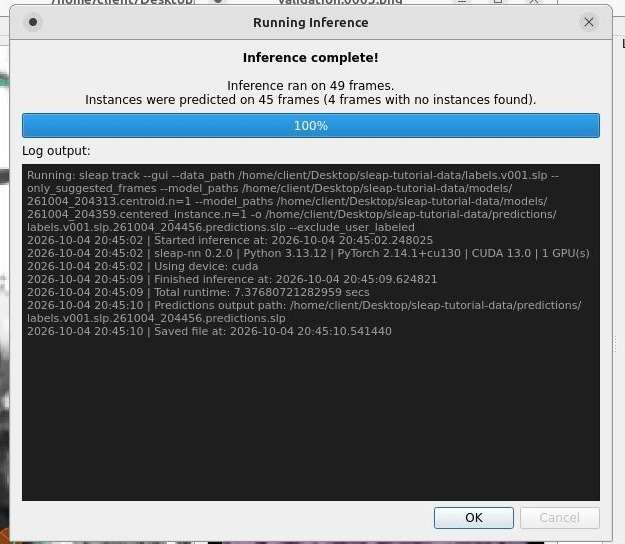
You did it! 
If you run training a second time
Once a model exists, the profile dropdown at the top of each model tab changes from
[baseline...] to [Trained] ..., and the Resume training (fine-tune) and
Reuse model (don't retrain) options become available. To repeat this section from
scratch, set the dropdowns back to the [baseline...] profiles first — otherwise you'll
be training from the previous run's configuration, and the settings above will have
reverted to that run's values.